

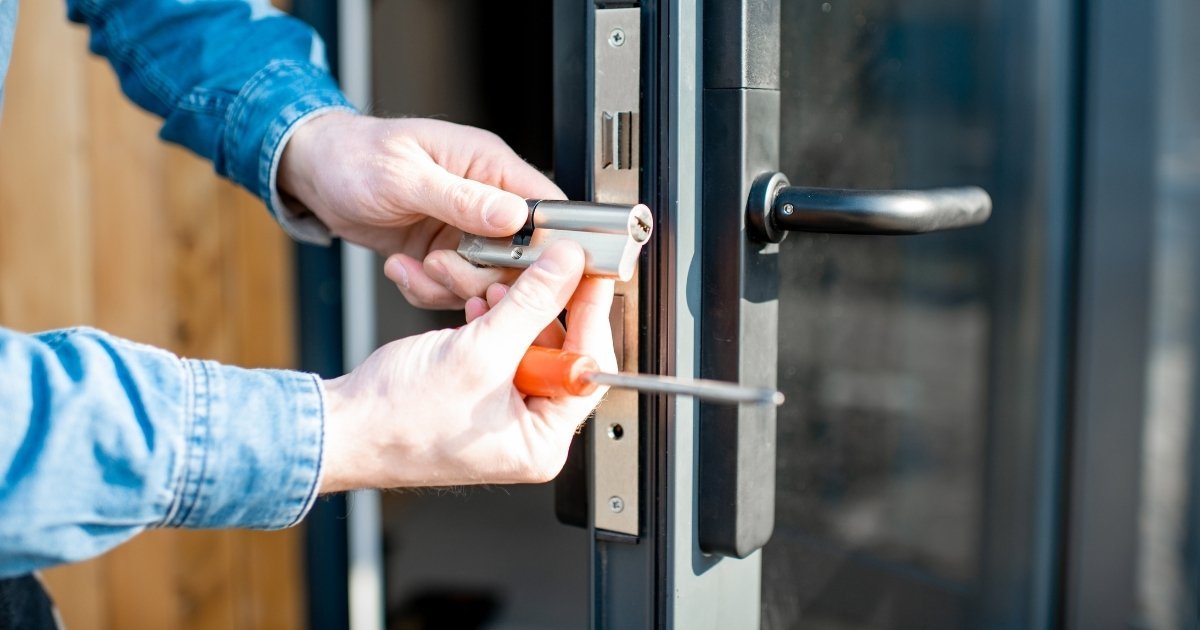
A secure patio starts with a properly fitted lock. Sliding doors are stylish yet vulnerable, making patio door lock installation essential. A precise fit strengthens security, prevents forced entry, and keeps your home protected year-round.
To install a patio door lock, remove the old mechanism, clean the frame, and check alignment. Then fit the new lock, secure it firmly, align the strike plate, and test for smooth operation.
At Kingdom Locksmith, we keep homes and businesses across the UK protected with 24/7 emergency service, no call-out fees, and DBS-checked professionals who deliver expert, dependable workmanship every time.
What is Patio Door Lock?
A patio door lock is a specialized locking mechanism designed for sliding or hinged patio doors to enhance home security. It typically features a latch or bolt that secures the moving door panel to the frame or fixed panel, preventing forced entry or lifting from the track.
Available in keyed, latch, and multipoint designs, patio door locks combine smooth operation with durability to protect access points exposed to outdoor areas.
Essential Tools to Install Patio Door Lock
A precise installation starts with the right tools. Each instrument serves a purpose. Keep everything ready before beginning the process.
| Tool | Purpose and Technical Detail |
| Drill | Drives screw holes into wood, vinyl, or aluminum frames. Use a variable-speed drill for torque control and to prevent surface cracking. |
| Drill Bits | Select bits based on frame material. Use high-speed steel for metal, brad-point bits for wood, and carbide-tipped bits for composite frames. |
| Screwdriver (Phillips and Flathead) | Tightens and removes hardware screws. Use a magnetic tip for small screws to avoid slipping near glass panels. |
| Measuring Tape | Measures backset, lock placement height, and spacing between screw points. Precision within one millimeter is critical for alignment. |
| Pencil or Marker | Marks drill points and alignment lines. Use a fine-tip marker for smooth frames and a carpenter’s pencil for wood. |
| Level | Checks lock alignment horizontally and vertically. Even a 2° tilt can cause latch misalignment. Use a digital or bubble level for better accuracy. |
| Chisel | Cuts mortises for flush lock fitment. Use a sharp 12mm chisel for detailed work on wood frames, keeping edges smooth to prevent splitting. |
| Hammer or Mallet | Taps the chisel or secures hardware gently. A rubber mallet prevents damage to vinyl or aluminum surfaces. |
| Safety Glasses | Shield eyour yes from metal shavings or wood splinters during drilling or chiseling. ANSI Z87.1-rated eyewear is preferred for impact resistance. |
| Masking Tape | Applied over drill points to reduce bit slippage and prevent scratching on glass or metal surfaces. Use painter-grade tape for clean removal. |
| Vacuum or Brush | Removes dust and metal filings from drilled holes and tracks. Keep mechanisms clear to prevent later jamming or rough operation. |
How to Install a Patio Door Lock? Step-by-Step Guide
Your patio door protects your space and adds structure to your home’s security. Installing the lock demands focus and precision. Each mark, drill point, and screw must align perfectly for smooth operation. Keep tools close, maintain a clear workspace, and handle every step with measured control.
Now move through each step carefully to achieve a clean, professional installation.
Step 1: Remove the Old Lock
Start by sliding the patio door halfway open. This gives you balance and room to move. Keep one hand on the handle so the door stays steady. Next, use a Phillips screwdriver to remove the handle screws. Place each screw in a tray as small parts disappear fast during work. Once the screws are out, separate the handles gently. Avoid forcing them; pressure can bend the trim plate.
Then, locate the mortise lock screws along the door edge. Loosen them evenly and pull the lock body straight out using pliers. Move slowly to avoid scratching the cavity.
Run your fingertip inside the pocket. If you feel rust, filings, or sharp burrs, note them for cleaning. Each step prepares the surface for perfect alignment in the next stage.
Step 2: Clean the Lock Area
Now that the old lock is out, focus on refining the cavity. Even minor debris can misalign the new mechanism. Begin by using a vacuum with a narrow nozzle to extract filings from corners and recesses. Switch to a fine detailing brush to lift remaining dust from screw holes and edges. Wipe the cavity and frame with a lint-free microfiber cloth to remove surface residue.
If corrosion appears, use 400-grit sandpaper to level the area. Work along the grain, not across it. Finally, inspect the mortise pocket for uneven ridges or burrs; the surface should feel smooth and flat under your fingertips. This precise preparation sets the foundation for accurate lock seating in the next step.
Step 3: Inspect the Door and Frame
After cleaning, check the door and frame for structural accuracy. Slide the door open and closed. It should move smoothly without grinding. Examine the frame edges for cracks, dents, or warping. If needed, repair your patio door lock.
Use a straightedge to confirm the frame sits flush along its length. Press the corners to test rigidity and tighten any loose roller or hinge screws. Stable alignment here ensures the new lock fits square and operates cleanly in the next step.
Step 4: Position the New Lock
With the door and frame confirmed stable, move to fitting the new lock. Hold the mortise body against the cavity and align it flush with the frame edge. Use the existing holes as reference points; if they don’t match, mark new centers with a fine-tip marker.
Keep the lock level as small tilts cause latch binding later. Confirm the keyway direction before drilling. When alignment feels exact, mark the strike plate position to prepare for fixing.
Step 5: Secure the Lock in Place
After positioning, begin fastening. Insert the mortise lock into the cavity and hold it flush. Tighten the retaining screws evenly. Alternate between them to maintain tension balance. Avoid overtightening; it can distort the lock body.
Reattach the handles from both sides and thread each screw until snug. Check the latch movement by turning the key once; a smooth motion confirms correct seating. With the lock secured, the next step focuses on testing and fine-tuning alignment.
Step 6: Install and Align the Strike Plate
With the lock body secured, move to the strike plate on the frame. Close the door gently and mark where the latch meets the frame edge. Position the strike plate directly over that mark, keeping its lip aligned with the latch path.
Drill pilot holes using a bit slightly smaller than your screws. Fasten the plate evenly and uneven torque causes misalignment. Test-latch once to confirm smooth bolt engagement before tightening fully. Precise plate alignment guarantees consistent locking action.
Step 7: Test the Lock Operation
Now test the system under full motion. Slide the door closed and turn the key or thumb lever. The latch should engage cleanly with no scraping or resistance. Unlock and relock several times to confirm a consistent feel.
Check handle travel and listen for friction sounds inside the mortise. If the bolt drags, adjust the strike plate slightly upward or downward. Smooth, balanced operation confirms correct internal alignment and gear tension.
Step 8: Final Security Check
After function testing, verify overall security. Lock the door and apply firm outward pressure on the panel; it should hold tight without flex. Inspect every screw, such as on handle, strike plate, and mortise for firm seating.
Confirm the key turns freely from both sides. Check weatherstripping for even contact along the frame. Finally, run one last open-close cycle to confirm proper engagement. This closing check guarantees your patio door lock delivers stable, professional-grade protection.
How to Choose the Right Patio Door Lock
Lock Type
Start by thinking about how you use your door daily. Mortise locks sit hidden inside the frame and give a clean, solid finish. Keyed handles add direct key control. It is ideal for main entrances. Foot bolts and security bars work best as secondary protection. Match the lock style to how you want to secure your space.
Door Style Compatibility
Look closely at your door material before buying. Vinyl, aluminum, and wood each demand specific lock depths and screw types. Mortise locks fit thicker wood frames, while surface-mounted models suit slimmer aluminum tracks. Measure your cavity precisely. Tight compatibility makes installation smoother and more durable.
Security Level
Decide how much protection matters for your setup. If your patio faces open ground, go with hardened steel bolts or multi-point latches. Look for ANSI Grade 2 or 3 hardware for verified strength. Reinforced strike plates and anti-lift tabs stop forced entry before it starts.
Ease of Installation
Match the complexity of the lock to your comfort level. Surface-mount locks install easily with basic tools, perfect for quick upgrades. Mortise systems demand exact drilling and alignment but offer professional-grade strength. Choose a model with templates or adjustable latches to reduce setup errors.
Design and Finish
Think of design as part of your home’s character. Sleek matte black and satin nickel finishes suit modern spaces, while bronze pairs better with traditional frames. Corrosion-resistant coatings keep hardware clean longer. The right finish blends security with style.
Budget and Brand Quality
Invest in hardware that lasts. Cheaper models often use soft alloys that wear fast. Go for reputable brands that back their locks with long warranties and accessible replacement parts. Spending slightly more now means fewer failures and smoother performance later.
Additional Features
Add functionality that fits your lifestyle. Smart locks bring keyless control, and alarm-linked models send alerts instantly. If you live near the coast, choose corrosion-proof finishes and sealed interiors. Secondary foot bolts or bars increase resistance and are small upgrades that create major peace of mind.
How to Maintain Your Patio Door Lock?
Regular maintenance keeps your lock precise, smooth, and long-lasting. A few small habits prevent wear and mechanical failure over time.
- Apply silicone or graphite lubricant every six months to the latch, keyway, and internal gears for friction-free operation.
- Inspect handle, strike plate, and mortise screws quarterly; loose fittings cause misalignment and rattling.
- Use compressed air or a soft brush to remove dust, filings, or cobwebs that interfere with the mechanism.
- Check the frame gasket and door edges; damaged seals invite moisture, leading to corrosion.
- Insert and rotate the key monthly to keep pins active and prevent seizing.
- Misaligned rollers shift the panel and strain the latch. Adjust height screws for a smooth slide.
- Clean handles and plates with mild soap and a microfiber cloth to prevent finish dulling or oxidation.
- Swap damaged screws, handles, or lock cylinders early to avoid full system failure later.
Troubleshooting Common Patio Door Lock Issues
When your patio door lock starts acting up, small problems can quickly weaken overall security. Understanding what causes them and fixing them early keeps your lock system reliable and smooth.
Key Won’t Turn in the Lock
Check for dirt or metal filings inside the keyway. Spray a short burst of graphite or silicone lubricant, then insert and rotate the key gently. Avoid forcing it; that can shear internal pins. If stiffness continues, remove the cylinder and inspect for worn tumblers or a bent key blade.
Lock Feels Loose or Wobbly
A loose lock usually means stripped mounting screws or a worn mortise cavity. Remove the handle, then tighten or replace damaged screws with longer ones. If the cavity edges feel rounded, insert wooden or metal shims for reinforcement. Refit the handle snugly, avoiding over-tightening that can distort alignment.
Door Doesn’t Latch or Lock Properly
This often points to a misaligned strike plate or sagging rollers. Close the door slowly and see if the latch hits above or below the plate opening. Adjust the plate vertically with a screwdriver until the latch enters cleanly. Lubricate the latch tongue and track for smoother closing.
Bolt or Latch Sticks When Locking or Unlocking
Dust or rust buildup inside the mortise mechanism is the usual cause. Remove the faceplate screws and blow compressed air into the cavity. Apply a thin layer of dry silicone spray to the latch and internal gear. Reinstall and test the movement several times until it cycles smoothly.
Door Slides but Doesn’t Lock Securely
Inspect the roller track for debris or wear. Dirt under the rollers keeps the panel from closing flush against the frame. Clean the track with a stiff brush and vacuum it clear. Adjust the roller height using the screw near the base of the door until the latch seats tightly.
Lock Cylinder Jammed or Rusted
Outdoor exposure often leads to corrosion inside the cylinder. Spray a corrosion remover or penetrating oil sparingly into the keyway. Insert the key several times to break up the residue. If the cylinder still binds, remove it entirely and soak in a rust-removal solution before re-lubricating.
Misaligned Strike Plate
A misaligned strike plate causes partial locking or latch scraping. Mark the latch’s true contact point using chalk or marker. Loosen the strike screws and shift the plate slightly in that direction. Retighten, then close the door to test fit. Add metal filler plates if excessive gaps remain.
In Closing
Installing a patio door lock adds both protection and precision to your home’s security. When fitted correctly, it strengthens your entryway, keeps movement smooth, and minimizes long-term wear.
If you’re facing alignment issues or want professional-grade security, Kingdom Locksmith is your trusted local expert. Our skilled team offers 24/7 locksmith services across the UK, fast, reliable, and designed to make your kingdom safe with confidence and care.
Frequently Asked Questions
Question: Can I install a patio door lock without removing the entire handle?
Answer: Yes. Most replacement locks fit without taking off the full handle assembly. You’ll only need to remove the internal mechanism to reach the mounting screws and align the new lock precisely with the strike plate.
Question: What type of patio door lock offers the best security?
Answer: Multipoint locks provide the strongest protection. They secure the door at multiple points, making prying nearly impossible. For sliding doors, choose a keyed handle or anti-lift bolt for superior resistance against forced entry.
Question: How often should I replace or service my patio door lock?
Answer: Check and lubricate the lock every six months. Replace it every 5–7 years, or sooner if you notice stiffness, corrosion, or loose fittings. Regular upkeep prevents alignment issues and lock failure.
Question: Can smart locks be used on patio doors?
Answer: Yes. Many smart locks are now designed for sliding or hinged patio doors. Look for models with remote access, keyless entry, and compatibility with your door frame and locking mechanism.
Question: What should I do if my patio door doesn’t close or latch properly after installation?
Answer: Inspect alignment first. Adjust the strike plate so the bolt seats smoothly. Tighten screws, lubricate moving parts, and test the lock several times until operation feels clean and secure.