How to Replace a Door Handle: Tools, Steps and Safety Tips

Replacing a door handle is a straightforward job when you have the right tools and know your door type. The short version: remove the old handle and faceplate, check the latch and spindle measurements, then fit the new handle so it lines up properly with the lock. Interior handles are quick to swap, while front doors with uPVC or multi-point systems need more care.
A loose, sticky or drooping handle can indicate worn springs, loose fixings or strain from the lock. This Kingdom Locksmith guide explains how to separate a simple handle fault from a deeper mechanism problem.
Knowing how to replace a door handle properly is a genuinely useful skill for any homeowner. It saves a call-out for the simple jobs and helps you recognise when a problem is bigger than it looks.
This guide covers the tools you need, the measurements that matter, the step-by-step process, and the common mistakes that leave a door sticking or a lock under strain.
How to Replace a Door Handle? (Quick Answer)
If you are in a rush, here is the short version. Replacing a door handle means removing the old hardware, making sure the new latch lines up with the existing hole, and securing the new plates.
- Measure first: check the backset (the distance from the door edge to the centre of the handle) and, on uPVC doors, the PZ centres.
- Remove the old set: unscrew the internal handle and pull both sides away.
- Swap the latch: if the new set includes a latch, unscrew the old one from the door edge and slide the new one in.
- Fit the new spindle: insert the square metal bar through the latch.
- Secure the handles: slide the new handles onto the spindle and screw them into place from the inside.
- Test while open: never close the door until you have tested the handle and lock several times.
When Should You Replace a Door Handle?
Sometimes a handle has obviously given up. Other times the signs creep in slowly. Knowing when to stop repairing and start replacing can save you from a late-night lockout.
Signs Your Door Handle Needs Replacing
- A loose or wobbly handle: if the handle jiggles when you touch it, the internal springs or screw fixings have probably worn. You can sometimes tighten things up, but a wobble that keeps returning usually means the metal has fatigued.
- A stiff mechanism: if you have to force the handle down, the internal gearbox is likely grinding or rusted. That puts real strain on the lock, and it can end in a snapped key or a jammed door.
- A broken spring: if the handle droops towards the floor instead of sitting level, the spring cassette has snapped. On many modern handles these cannot easily be replaced on their own.
- Rust or corrosion: common in coastal areas such as Ipswich or Colchester, where salt air eats through cheap finishes. The resulting pitting eventually weakens the handle itself.
- A security upgrade: thin handles, or handles with visible screws on the outside, are vulnerable to lock snapping. Moving to a heavier, security-rated handle is a sensible improvement.
Door Handle Repair vs Replace: Which Is the Better Option?
A loose screw or dirt build-up may respond to cleaning and tightening. Once springs or cast components begin to fail, replacement is usually more practical than a temporary repair.
If you want to weigh the decision properly, read our full breakdown of lock repair vs replacement to see which route suits your budget and your security needs.
Tools You Need to Replace a Door Handle
You do not need a professional workshop for this job, but the right basics will stop you stripping screws or scratching the door.
- Screwdrivers: a Phillips head and a flathead. Use manual screwdrivers rather than a power drill for the final tightening to avoid over-torquing.
- Allen key: many modern lever handles use a small grub screw on the underside to hold the handle on the spindle. Check whether your new kit includes one.
- Tape measure: accuracy is everything. You need the distance between screw holes and the thickness of the door.
- Replacement handle set: make sure it matches the handing of your door (left or right) unless it is a universal model.
- Lubricant: a puff of graphite powder or a PTFE spray helps the new latch move smoothly. Avoid WD-40 on internal lock parts.
Step-by-Step Guide: How to Replace a Door Handle Properly
Follow a logical order and this is a simple task. The steps below include the small details that stop a door turning sticky later on.
Step 1: Remove the Old Door Handle
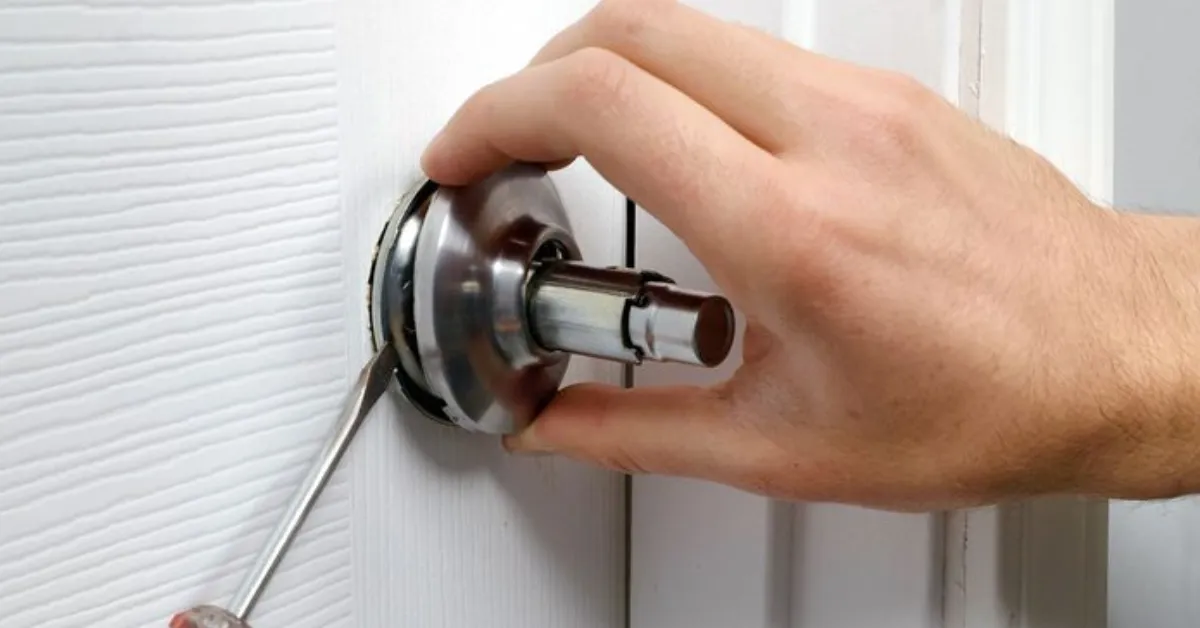
Open the door and wedge it with a doorstop so it cannot swing while you work. Find the screws on the internal handle plate and remove them completely. Once the internal plate is loose, the external plate should pull away easily. Catch the spindle (the square metal bar that connects the two handles) so it does not drop and scratch the floor.
Step 2: Unscrew and Remove the Latch Plate
Look at the edge of the door where the latch tongue sticks out. Two screws usually hold the plate in place. Remove them and gently ease the latch mechanism out of the door. If it is stuck, push a screwdriver through the handle hole and nudge it out from behind.
Step 3: Check the Door Latch and Alignment
Before fitting the new parts, look inside the hole. Clear out any wood dust or debris. Check that the mortice (the recess in the door) is deep enough for the new latch. If the new handle is a different brand, the latch may be slightly longer or shorter than the old one.
Step 4: Install the New Latch Mechanism
Slide the new latch into the hole in the door edge. The sloped face of the latch must point in the direction the door closes so it can click into the frame. Screw the latch plate into the door edge. If the old screw holes are stripped or too big, plug them with a toothpick and a dab of wood glue before driving the screws back in.
Step 5: Fit the New Door Handle
Insert the spindle through the square hole in the latch. Slide the external handle onto the spindle, then the internal handle. Holding both sides together, insert the fixing screws. A useful habit: hand-tighten first, check the handles sit perfectly vertical, then finish with the screwdriver.
Step 6: Test the Handle and Lock Operation
This is the step that matters most. Do not close the door yet. Press the handle down and check the latch retracts fully. Release it and check it springs back to horizontal. If there is a lock, turn the key or thumb-turn and make sure the bolt moves freely. Only when everything feels smooth should you close the door and test from both sides.
How to Change a Front Door Handle Safely
The stakes are higher on a front door. A mistake here can leave the house insecure overnight. Front door handles are usually part of a larger system, especially on uPVC and composite doors.
Additional Security Considerations for Front Doors
Front door security in the UK is covered by specific standards. Look for handles that meet PAS 24 or carry the British Standard Kitemark. These are designed to resist handle snapping, where an intruder breaks the handle by force to reach the lock behind it.
- Multi-point locking systems: these handles are much longer and drive several bolts at once. If you are changing one, the PZ centres (the distance from the handle centre to the keyhole) must match exactly, usually 92mm or 70mm depending on the door.
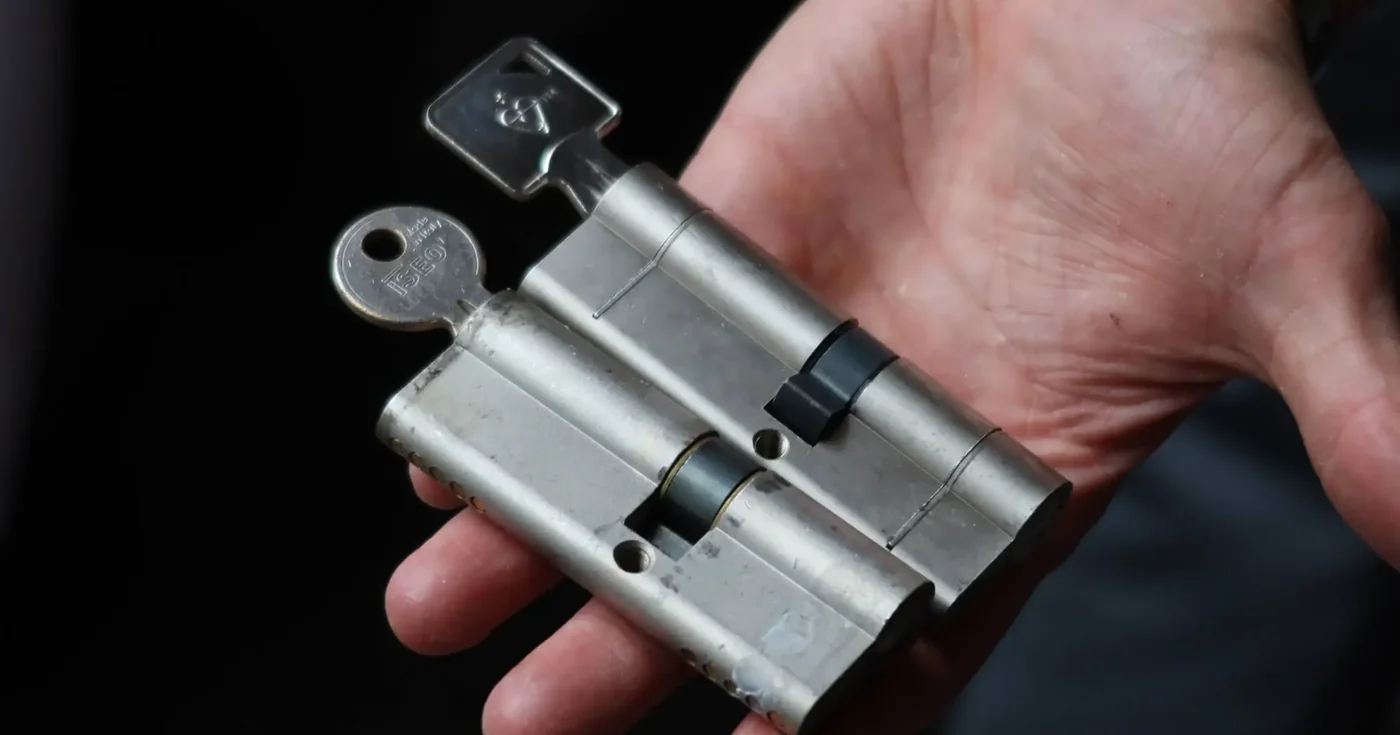
- Euro cylinder alignment: the handle and lock work as a team. If the handle does not sit flush, the cylinder can protrude, which makes it an easy target for burglars.
For a fuller breakdown of securing your entrance, see our guide on upgrading door handles for better home security.
Common Mistakes When Changing a Front Door Handle
A common mistake is fitting an internal handle to an external door. Internal hardware may lack weather resistance and a reinforced backplate. Another is over-tightening, which can distort a composite or uPVC door and make the lock bind.
Can You Change a Door Handle Without Changing the Lock?
Yes, absolutely. The handle and the lock are separate components that happen to share the same part of the door. They do, however, need to be compatible.
When You Can Keep the Existing Lock
If the lock works perfectly and you simply want a new look, you can keep it, provided the new handle has:
- A compatible backset: the handle hole must line up with the hole in your lock.
- The same spindle size: most UK handles use an 8mm square spindle.
- Matching fixing points: the through-door screws must pass through the existing holes in the lock case.
The guide to changing a front door handle without changing the lock explains when the existing cylinder can remain.
When the Lock Mechanism Also Needs Replacing
If the latch stays sticky or the deadbolt refuses to move even with the handle off, the lock itself is the problem. Since the handle is already off, it is the ideal moment to follow our guide to changing a door lock and refresh the whole entrance in one go.
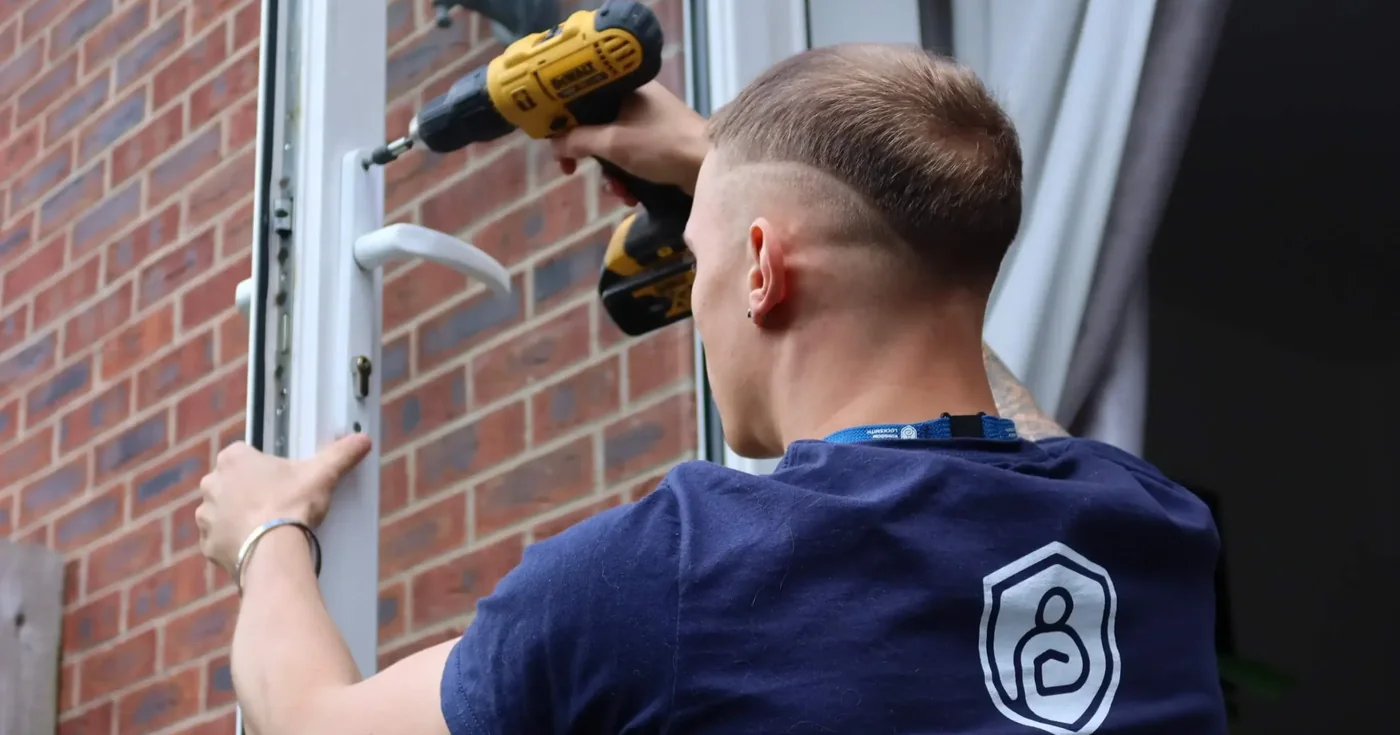
How to Replace a uPVC Door Handle
Replacing a uPVC door handle differs slightly from swapping a standard interior handle, because most uPVC doors use a long backplate and a multi-point locking system. Before buying a replacement, measure two things: the distance between the screw holes (commonly 122mm or 215mm) and the PZ measurement (the distance from the centre of the handle spindle to the centre of the keyhole).
Start by removing the two long fixing screws on the inside handle. Both handles should then slide off, exposing the spindle and the euro cylinder. Check that the spindle length matches the new handle and that the fixing points line up exactly.
When fitting the new handle, do not overtighten the screws. Too much torque can pull the mechanism out of alignment and make the door stick. If the door feels stiff after installation, the problem may not be the handle at all; it may be the multi-point locking system needing adjustment.
A common mistake is buying a handle that looks the same without checking the measurements. A few millimetres of difference is enough to prevent proper alignment. If the door still catches after the handle change, our guide on how to adjust a uPVC door locking mechanism explains how to get the alignment spot on.
How to Replace a Wooden Door Handle
Wooden doors are often easier to work with than uPVC or metal, but they reward care and precision. Before removing the old handle, check whether the door uses a simple tubular latch or a mortice sash lock, because the internal mechanism decides which replacement handle you need.
Unscrew the handle from the inside plate first. Once both sides are off, slide out the spindle and inspect the latch. If the latch is stiff or worn, this is a good moment to replace it too.
Alignment is the usual sticking point with wooden doors. If the new handle has a slightly different backplate shape, you may be left with exposed screw holes or indent marks from the old plate. In some cases you will need to widen the mortice gently with a wood chisel so the new latch or plate sits flush. Work slowly; removing too much timber weakens the door edge.
One more important habit: always pre-drill pilot holes before driving new screws. Wood splits easily near the edges of a door, and pre-drilling gives a secure fixing without damaging the timber.
After installation, test the handle several times before closing the door fully. The latch should retract smoothly and spring back without sticking. If it does not, the cause is usually minor misalignment rather than a faulty handle.
How to Replace Handles on Aluminium or Metal Doors
Aluminium and metal doors are common in modern flats, offices and commercial buildings. They are durable, but they leave far less room for adjustment than timber.
Most aluminium doors use face-fixed handles, with screws that pass through pre-drilled holes in the metal. Because holes in metal cannot easily be filled or repositioned, the replacement handle must have exactly the same fixing points and measurements as the original.
Begin by removing the interior fixing screws, then separate both sides of the handle and check the spindle. If the spindle is worn or bent, replace it, or you will be dealing with stiffness and misalignment again before long.
If the metal around the old handle has picked up scratches or dents over the years, a replacement with a slightly larger backplate will cover the marks. It is a simple cosmetic fix that avoids an expensive door panel repair.
Take care not to overtighten screws in metal. Unlike wood, metal does not compress, and forcing the screws can strip threads or distort the fixing points. Tighten firmly and stop once secure.
How to Change a Composite Front Door Handle
Composite front doors are built for security and insulation, and because they are made from several materials compressed together, they behave differently from single-material doors.
Before replacing the handle, measure the PZ centres and the screw hole spacing carefully. Most composite doors use a multi-point locking system with a euro cylinder, so alignment matters enormously.
To remove the handle, undo the internal fixing bolts and gently pull both sides apart. Note whether the existing handle uses a split spindle. A split spindle keeps the outside handle fixed unless the door is unlocked, which adds a layer of security; if the new handle does not support it, you may unintentionally downgrade the door.
When fitting the new handle, do not fully tighten the screws straight away. Composite doors expand and contract slightly with temperature, and leaving a tiny amount of tolerance in the fixings helps prevent stiffness in very hot or cold weather.
After installation, test the door with the key and the handle several times before locking it completely. The handle should lift smoothly to engage the multi-point locks, and the key should turn without resistance. If the door feels stiff, the cause is usually alignment rather than a faulty handle. On a security-focused door, precision matters far more than speed.
Common Problems After Replacing a Door Handle (And How to Fix Them)
Finishing the job and finding the door still does not feel right is frustrating. Here is how to troubleshoot the usual suspects:
- The handle feels loose: check the grub screw under the handle. If that is tight, you may need sprung handles (or separate spring cassettes) if your new set did not include them.
- The door will not latch: the latch may be upside down; the slope must face the frame. If that is correct, the strike plate on the frame may need moving by a millimetre or two.
- The lock will not turn: the handle plate may be slightly crooked and pressing on the cylinder. Loosen the screws, realign the plate and tighten again.
- A misaligned strike plate: if the door closes but will not click home, the latch is not reaching the hole in the frame. Lightly filing the opening of the metal strike plate often fixes it.
DIY or a Professional Locksmith: Which Is Safer?
Basic handle replacement is accessible to many homeowners, but the risks depend on the door and locking system.
Risks of Incorrect Installation
A poorly fitted handle can cause entrapment, where the handle moves but the door stays locked. That is a genuine fire safety hazard. A handle that fails to protect the lock properly can also cause problems with your home insurance, since most policies expect final exit doors to meet specific security standards. A DIY mistake here can prove expensive later.
When to Call a Professional Locksmith
If a multipoint system is jammed or the door uses specialist composite construction, a professional diagnosis may be safer. The guide to emergency locksmith costs and UK prices explains common price factors.
Key Factors to Consider When Replacing a Door Handle
Before you head to the shops, keep four things in mind:
- Finish: polished chrome, satin nickel or matte black. Pick one that matches your letterbox and hinges.
- Backset: the distance from the door edge to the centre of the handle, typically 44mm, 57mm or 64mm in the UK.
- Usage: a bathroom needs a privacy turn; a bedroom usually just needs a latch.
- Smart technology: if you are tired of keys altogether, this may be the moment to learn how to install a smart lock instead of fitting a traditional handle.
Getting Professional Help With Door Handle Replacement
If you would rather use a professional, ask how the handle will be measured, aligned with the cylinder and tested. Confirm what happens if the inspection reveals a fault in the lock rather than the handle.
Availability must be checked for the exact address. A location page such as Coventry is not a substitute for confirmation before booking.
Whoever you hire, it is worth asking a few direct questions of any locksmith: whether the engineer attending is DBS checked, what the call-out fee is, and what happens if the quote changes on site. Clear answers to those three tell you a lot about the company.
Final Checklist Before You Finish Replacing a Door Handle
Before you put the tools away, run through this list:
- Does the handle return to horizontal on its own?
- Does the latch retract fully when the handle is pressed?
- Can you lock and unlock the door easily from both sides?
- Are there gaps between the handle plate and the door surface?
- Does the door stay shut when you pull it without turning the handle?
Wrapping Up
Replacing a door handle can improve operation, appearance and, with the right specification, security. Use this guide for a careful DIY assessment and stop if the lock or door needs specialist work.
For provider information, see Kingdom Locksmith and compare the proposed scope with another vetted professional.
Use the contact page or call +44 (333) 006 9691 to ask about current availability and the specific job.
Frequently Asked Questions (FAQs)
How long does it take to replace a door handle?
Usually 10 to 30 minutes, depending on the door type and whether you are keeping the existing lock. Interior handles are the quickest. Front door handles with multi-point locking take longer, and corroded fixings or a misaligned latch can add time.
Can I replace a door handle myself?
Yes, if you have basic DIY skills and the right tools. Most interior and standard front door handles can be changed with nothing more than a screwdriver. If the door uses a multi-point locking system or a euro cylinder, or the alignment is off, a professional locksmith is the safer choice to avoid damaging the mechanism.
Do I need to replace the lock when changing handles?
Not usually. If the existing lock works properly and the new handle matches the same backset, spindle size and fixing points, the lock can stay. Replace it only if it is worn, damaged or misaligned, or if you are upgrading security on a front door.
How much does a locksmith charge to replace a door handle in the UK?
A typical UK price is between £60 and £120 for a standard door handle, depending on the door and the handle chosen. uPVC and composite front doors with multi-point systems tend to cost more, and out-of-hours call-outs, parts and location all affect the final figure.
How do I know if my new handle will fit my existing door?
Measure the backset, the centre-to-centre (PZ) distance and the spindle size, plus the screw fixing positions, before buying a replacement. On uPVC and composite doors the PZ measurement matters most. If the measurements match your existing handle, the new one should fit without any change to the lock.